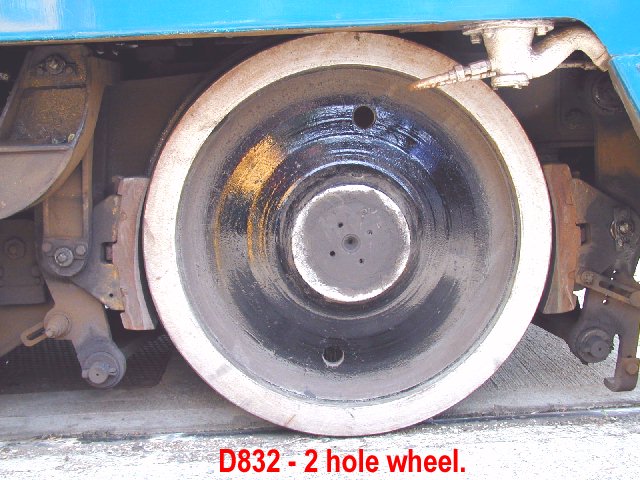
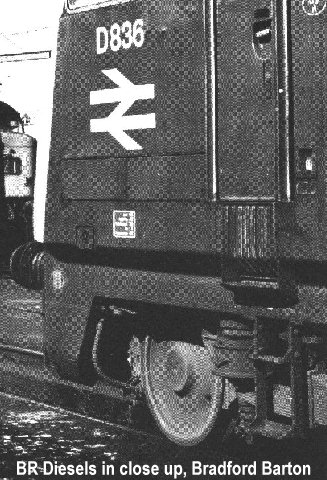
This is what the real thing looks like, photos of D832 on 5/8/00 |
|
|
|
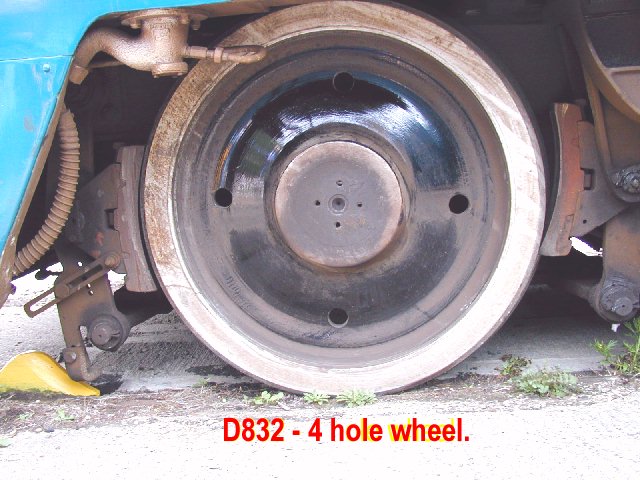
Since the Warship has inside bearing wheelsets leaving the wheels exposed to full view correct wheels are important to the appearance of the locomotive. The Bachmann wheels have quite a good appearance with a pronounced boss, but a check of the drawings and photos suggested that the 4 holes in the Bachmann wheel are incorrect, there should only be 2 smaller ones. Discovering that both Ultrascale and Alan Gibson also provide 4 holes in their Warship wheels provoked further research. Scouring photos in books and magazines was inconclusive few photos having sufficient detail to see the holes at all, the few that did supported 2 holes. A visit to Old Oak depot open day allowed inspection of D821 and D832, both locos have a mixture of 2-hole and 4-hole wheels! Between them 3 axles of 2-hole and 5 axles of 4-hole. It seems you can take your pick unless you can find specific evidence for your desired loco and period.
This is what the real thing looks like, photos of D832 on 5/8/00 |
|
|
|
My initial efforts were aimed at making use of the existing wheels and examination of the wheels suggested that it may be possible to fit an existing P4 tyre onto the plastic centre of the Bachman wheel. My method of doing this is described below.
Although the method worked I managed to spoil one of the wheels in an overconfident rush to finish! As Bachmann could not supply spares I had to look around for an alternative and found a set of Alan Gibson 3'2" bogie and tender wheels intended for an Austerity 2-8-0. Use of these is now my recommendation as a much simpler and quicker job! My method is shown below. More recently Ultrascale have produced a wheel for this purpose and their economy conversion set can be used in exactly the same way as the Alan Gibson wheels.
In an email to the E4um discussion group Ted Scannel had described his efforts at separating the tyre from the centre, in the light of the problems he described I decided to try turning off the unwanted bits on the lathe.
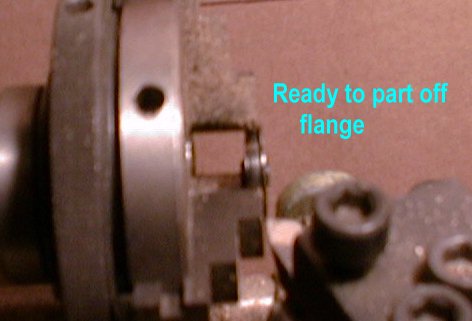
| I first chucked the wheel by the tread and turned off the flange and the rear of the wheel to a depth approx that of the visible tyre on the front. This cut did not seperate the tyre from the back so I then reversed the wheel and turned the tread until the insert came free. After a couple of tries I was able to seperate the parts with the first cut, the tool has to be skimming the chuck for that. see photo. |
|
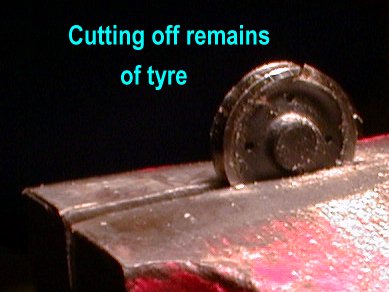
| The insert is still held tightly in the remains of the tyre so I cut through the tyre with a file edge to release it gently, see photo. |
|
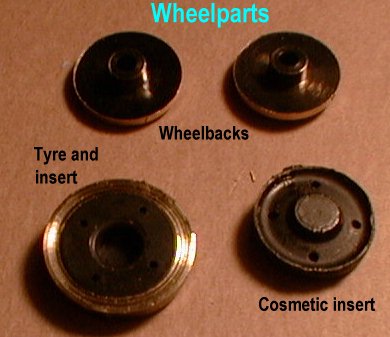
| It was then revealed that the wheel is actually composed of 3 pieces explaining Ted's
problems in trying to press the insert out.The bush visible at the rear of the wheel is
just that, a bush inserted in the brass wheel from the rear and cannot be pressed through
without destroying it. The cosmetic insert in the front of the wheel is just that and is
not connected to the bush. When seperated in the lathe I thus had a disc formed from the wheel back, complete with bush, (see photo) |
|
| and a cosmetic insert. (see photo) The cosmetic insert proved to be a perfect fit in a Studiolith 3'2" bogie wheel tyre. And the parts appear to be capable of re-assembly with suitable glue to make a P4 wheelset. |
|
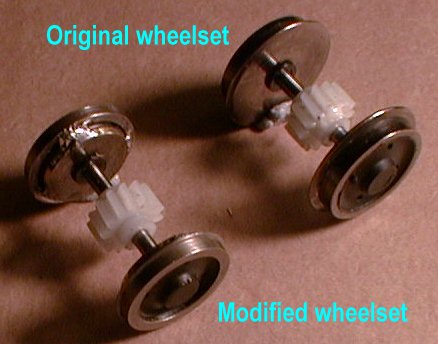
| Next step was to prepare another wheel and have a go at assembling the wheelset. The
result is shown in this photo. The second wheelset has now been assembled with loctite to hold the rear disc to the cosmetic insert and reinforced with solder. The solder also carries current from the tread to the back where the pickup wipers will rub. I tinned the edges of the rear disc and the back of the tyre at three spots 180 degrees apart before assembling with loctite then joined the tinned sections after assembly, as it was pre-tinned the joint could be made quickly without risk to the plastic. |
|
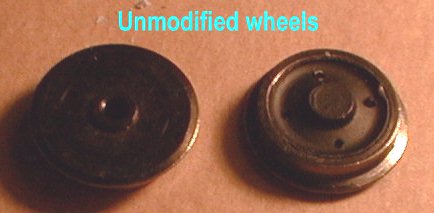
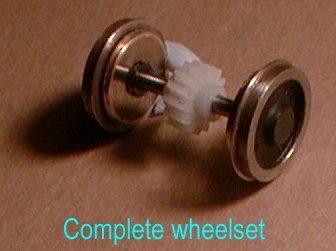
| The completed wheelset is shown here next to an
unmodified set. Now I have to complete the other three wheelsets ready for a trial run, should not be long now the method is established. |
|
Well, so much for confidence, In the process of tinning the wheel back discs I must have lingered a little to long on one of them and the plastic bush melted. Hence I have ended up with only three complete wheelsets!. So beware, remove the plastic bushes before tinning and put them back after cooling!
The Bachmann axles although the right diameter are not long enough for the AG wheels so it is necessary to transfer the axle gear to the AG axle. Pull the gear off straight as the Bachmann axle is knurled.
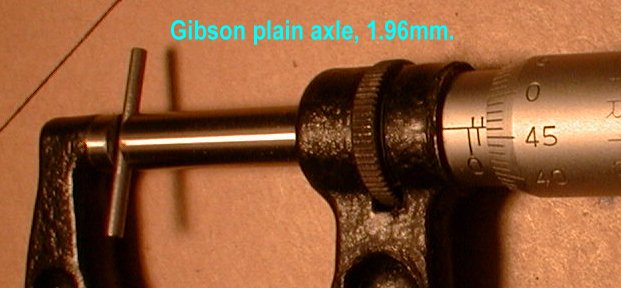
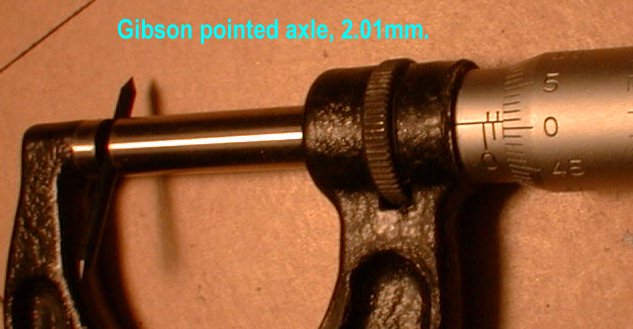
I first tried to use the plain end axles supplied with the AG wheels but found the axle gear to be a loose fit, as were the wheels. Investigation revealed that the AG plain axles are made of different stock to the pin-point axles and are unsuitable. I thus had to cut the pinpoints off the pointed axles using a cutting disc in the dremel. See these three photos for evidence,
Bachmann axles, AG plain axles and AG pinpoint axles.
The axles were then knurled a little in the centre, by rolling under the edge of a file, and the gears and wheels pressed on with the Unimat.
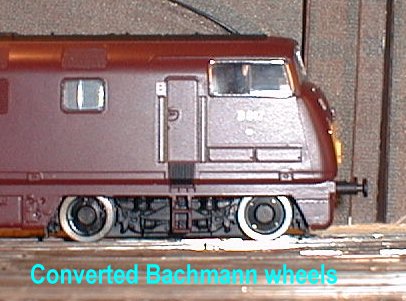
The loco was then reassembled and ran happily round the layout. For the
effect of the converted Bachmann wheels see this picture
and for the AG wheels this one. 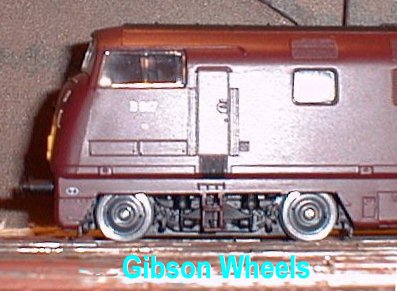
Copyright Keith Norgrove.
Last revised: August 27, 2003