|
|
|
|
|
|
Updated: 28 March 2007
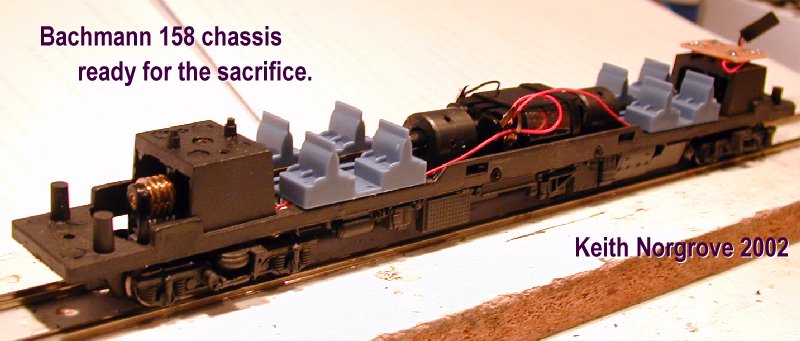
Various attempts at providing P4 power for DMUs had not been very successful, I tried NWSL PDT bogies, it took two of these to get a 3 car set up my hills, they were noisy and I never got the running quality to my satisfaction. A High Level lowrider ran OK in a single unit but slowly and having to run flat out put the noise up. While I was considering having a go at a 'Scannel' DMU drive I came across a cheap offer on a Bachmann 158 and decided to investigate if the drive from this could be fitted in a DMU.
It could and a description of my efforts follows.
First thing was to pull it apart and have a look at the bits.
|
|
|
|
|
|
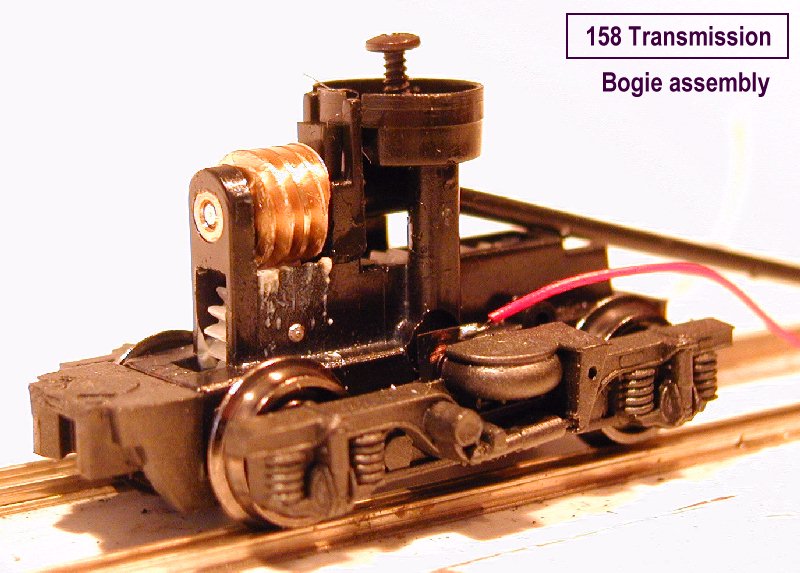
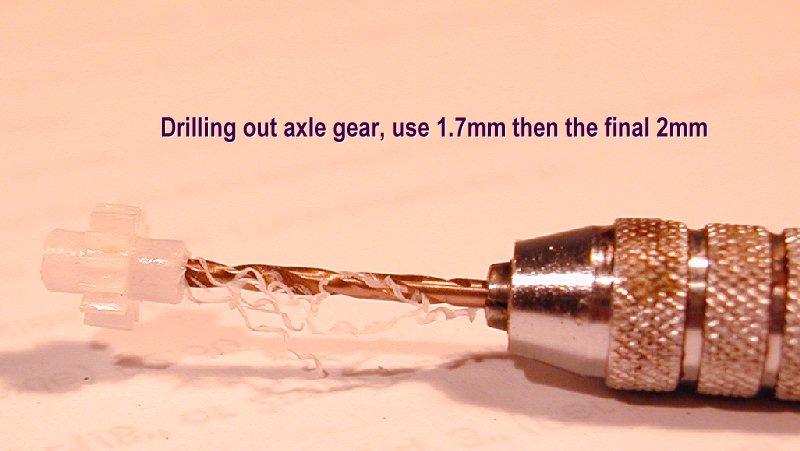
First essential for P4 is to deal with the wheelsets. Ultrascale do a drop in wheelset but this is the small diameter for the 158. I needed 3ft. wheels for a dmu. At first look the Bachman wheelset looked problematic, it comprises two half axles inserted in a gear/muff (ideal for split axle pick up but even so Bachmann use wipers) the bearing area of the axles is 2.63mm diameter and the inserted section only 1.6mm. To use standard 2mm axles I would need to find suitable bearings to match the axles to the gearbox and drill out the gears to be a push fit on the axle.
After trying every 2mm bearing in my collection without success the next exhibition yielded a packet of bearings from Kean Maygib (KM475) that did the job.
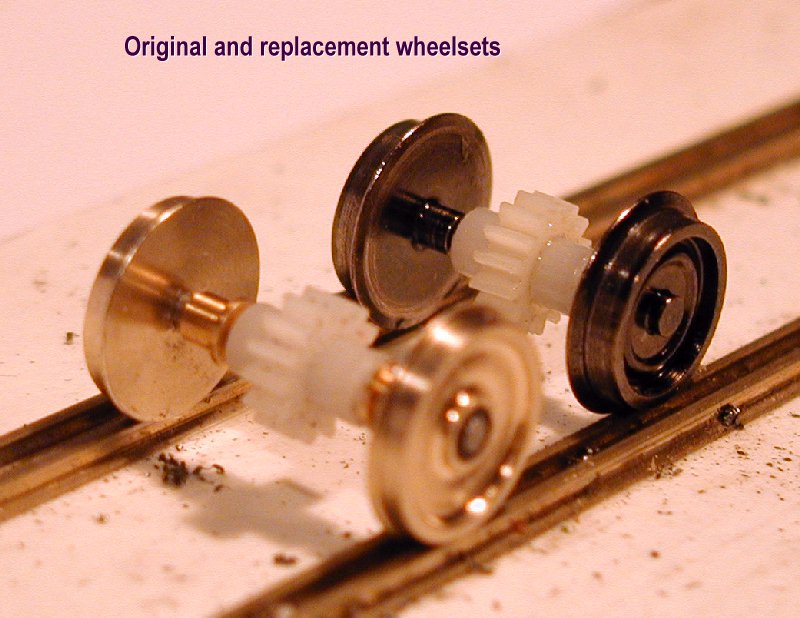
So a pair of Branchlines 3ft P4 wheels was fitted with the bearings and gears and tested in the gearbox. The bearings are a tight fit in the gearbox (see below) so have to be opened out to a loose fit on the axle to allow the wheels to compensate on rough track. Once proven on the first axle the other 3 were similarly treated. The pin points need to be removed from the axles as the bogies are inside framed.
|
|
|
|
|
|
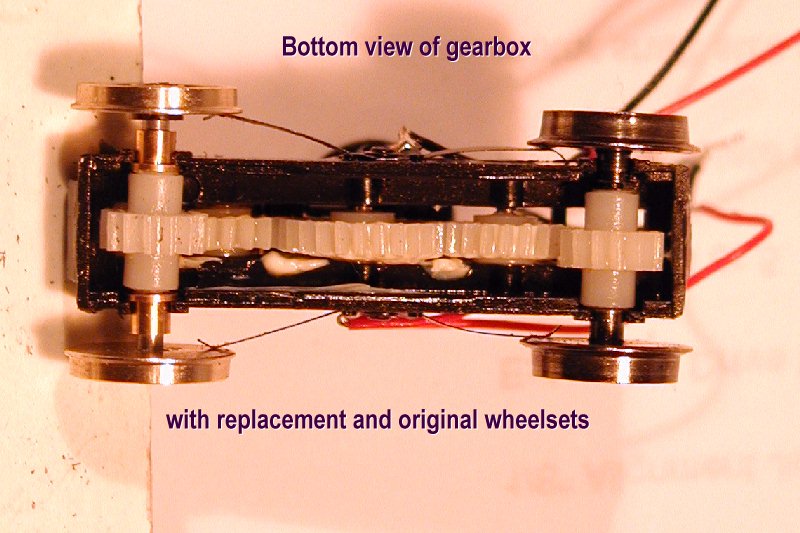
If you try to fit the bearings to the gearbox as is they are too big and the box will distort. The axleholes in the gearbox need to be opened out to a 'just tight fit' I did this slowly and carefully with a round needle file, need to be specially careful to maintain the centres as the hole is a keyhole rather than a complete circle and its easy to move the centre towards the keyhole gap. When you have the fit right clip the wheelsets in. The pickup wires need tweaking to rub on the wheel backs.
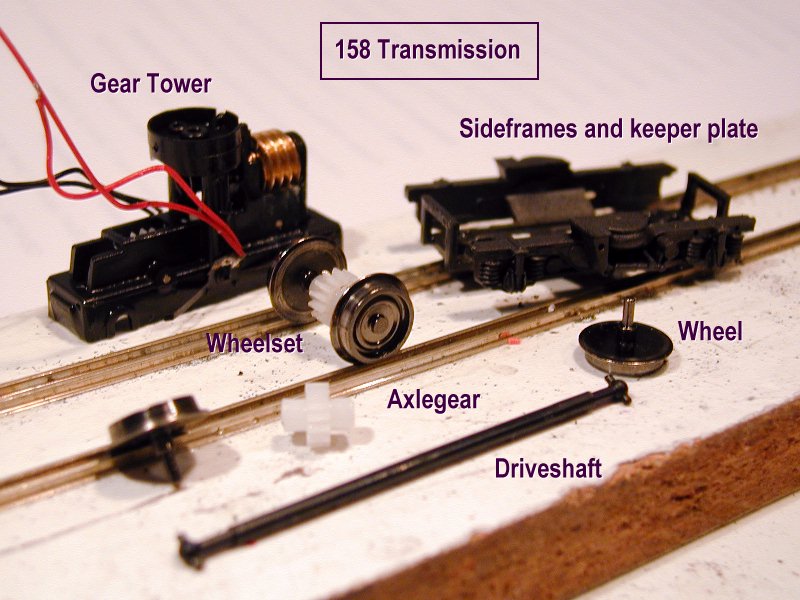
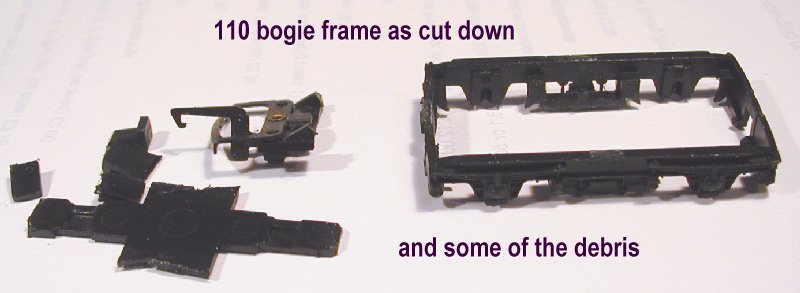
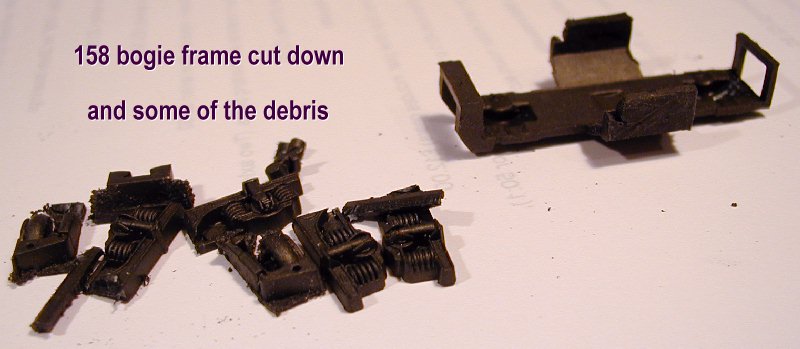
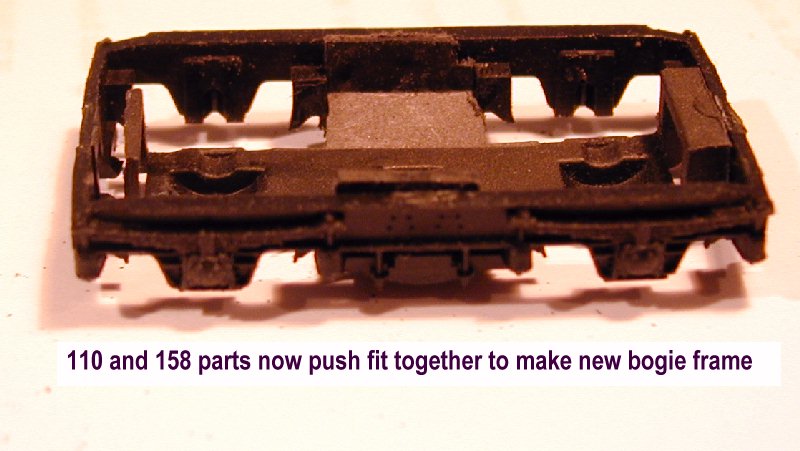
Next puzzle is the bogie sideframes, the class 158 sideframes need to be replaced by the Hornby DMU sideframes. Quite a lot of pondering done here before it became clear where to cut, done right the two bits are a push fit together and won't need any other fixing.At this point clip the keeper plate back on the gearbox and check that the axles are still free,(the driveshafts should spin freely in the fingers), most likely they will be very stiff as the keeper plate clamps on the bearings, if so then the bearings are not fitting far enough into the gearbox, do a bit more work, gently with a round file till you can clip the keeper plate on and everything runs free.
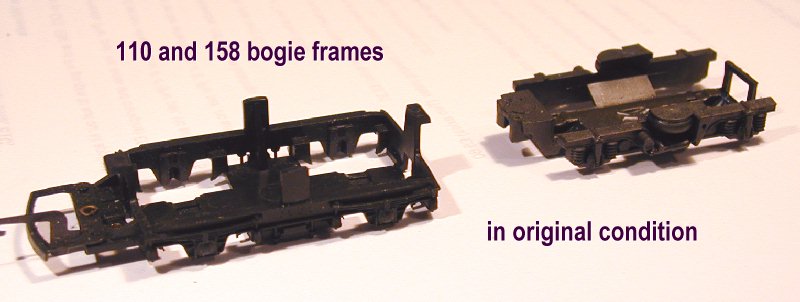 Bogies before alteration Bogies before alteration |
|
|
|
|
|
|
|
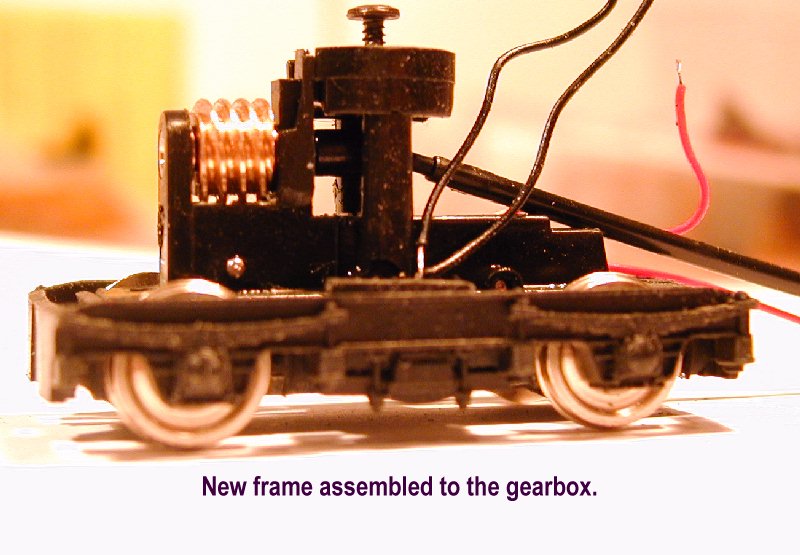
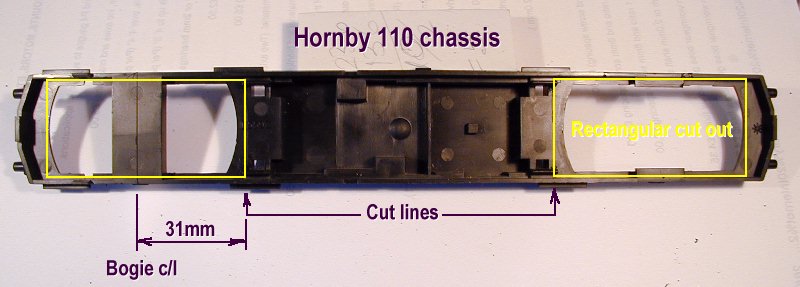
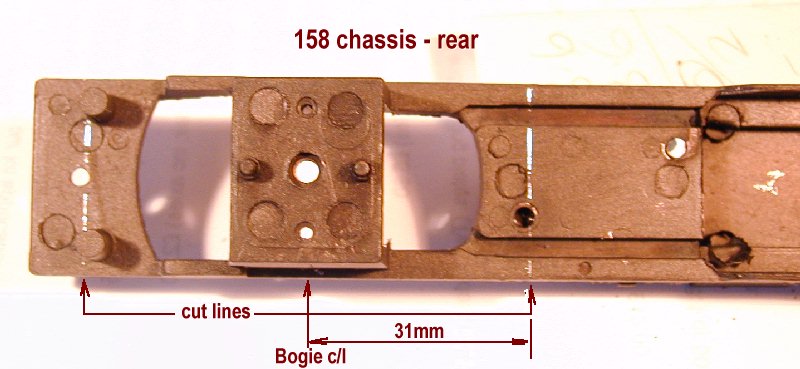
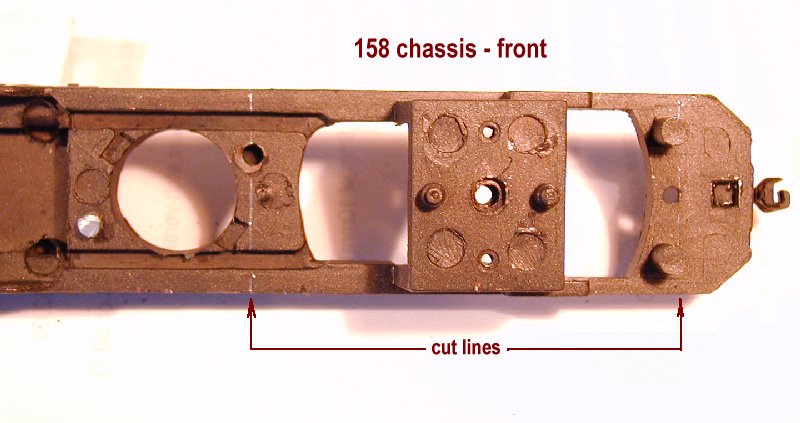
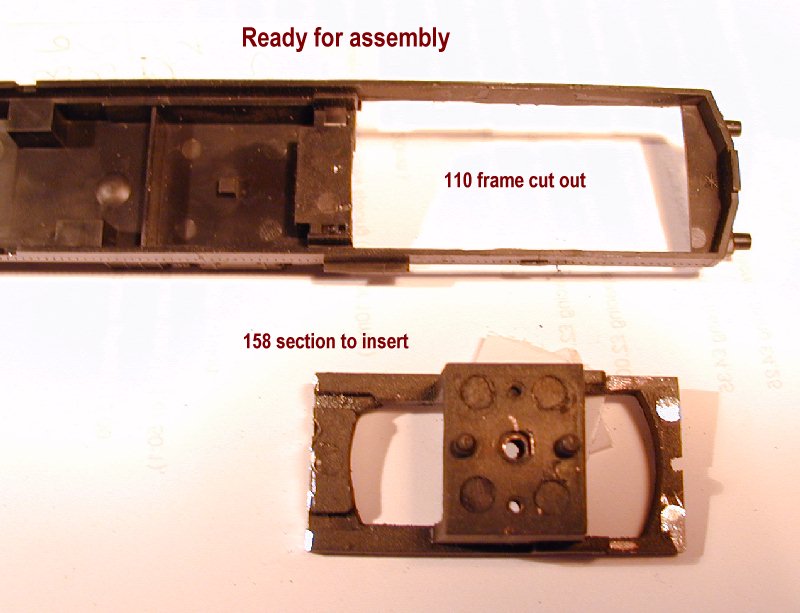
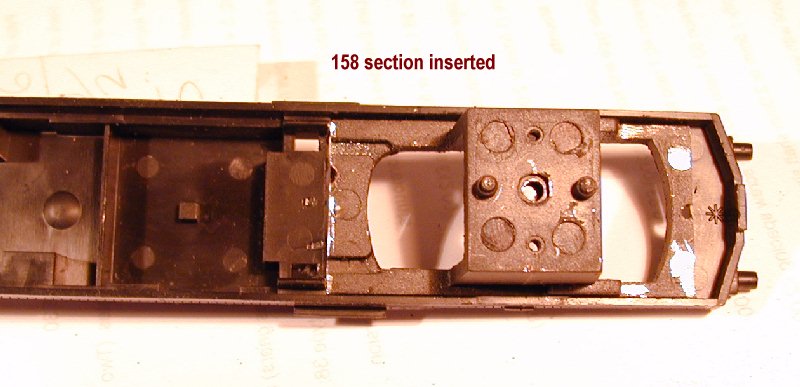
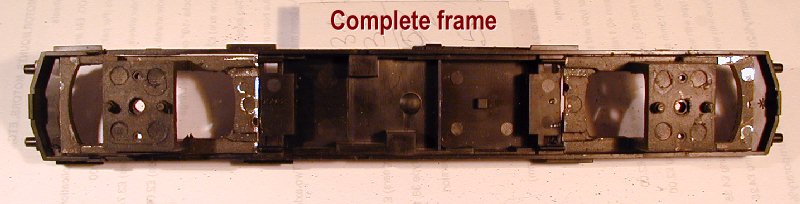
With two working bogies things start to look hopeful, next step is to fit the bogie pivots in the chassis, the relevant bits are cut from the Bachmann chassis and the Hornby chassis cut out to recieve them, with care this also can be a push fit needing no other fixing, just plasticard strips inside the Hornby chassis to keep the Bachmann parts in position.
 |
 |
 |
 |
 |
 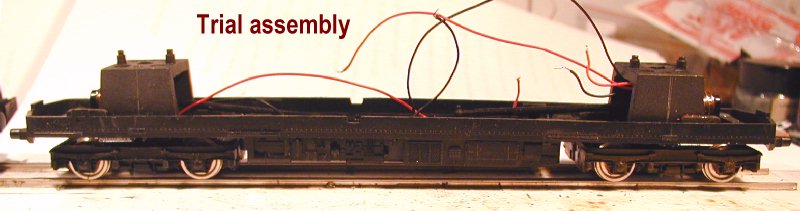 |
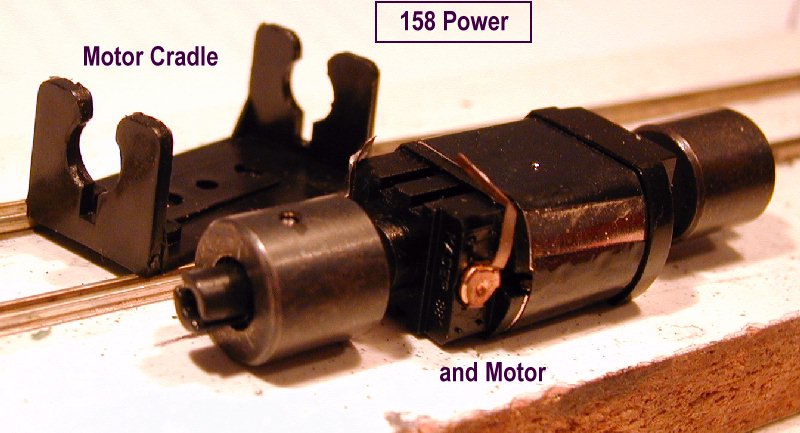
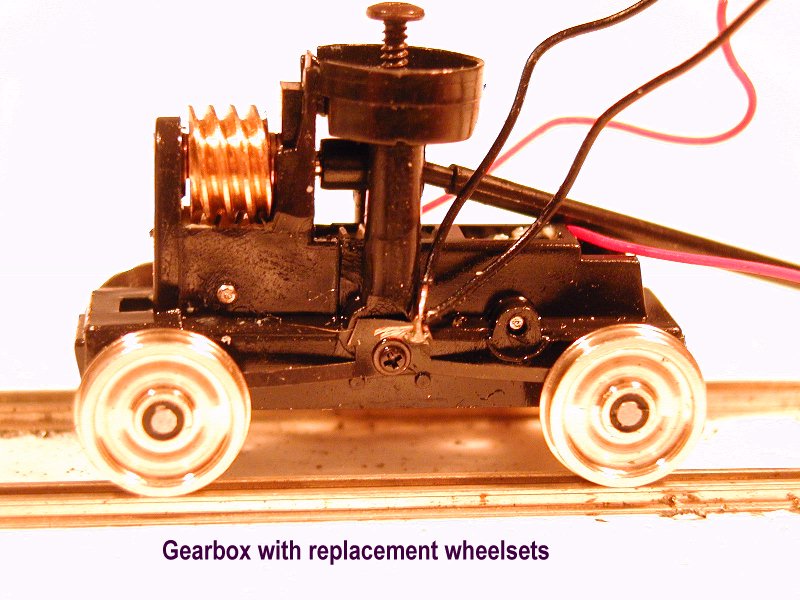
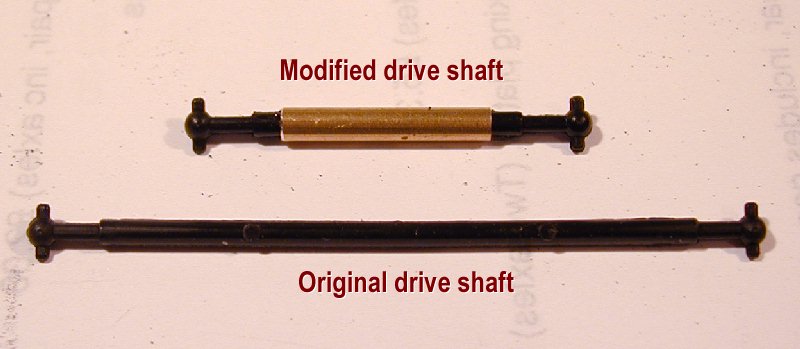
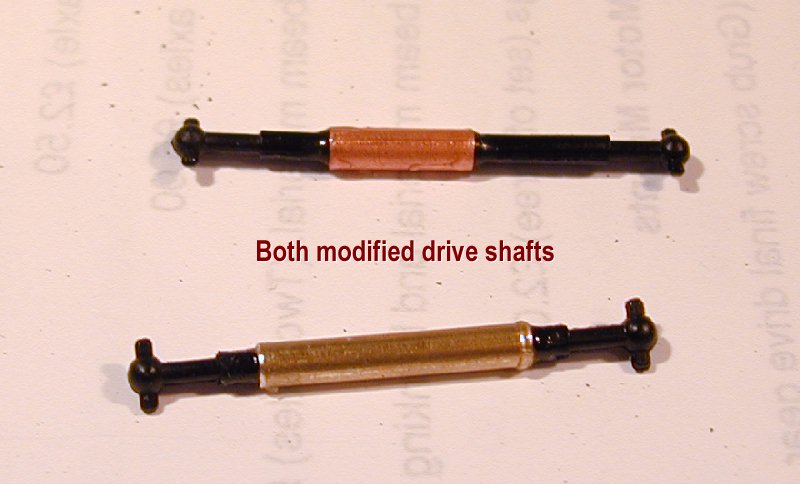
All that's left now is to fit the motor to the centre of the chassis and shorten the drive shafts to fit, these are just cut and the ends glued into a piece of brass tube.
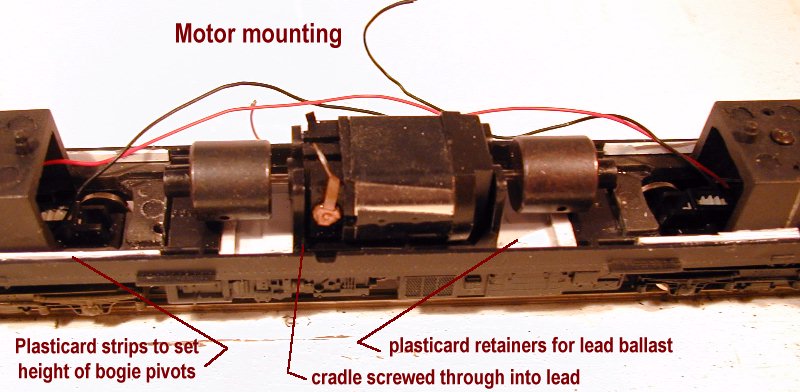
The motor should be fitted as low as possible in the centre of the chassis, the flywheels should just clear the crossmembers at each end of the central well, to achieve this the bottom of the well is packed with lead sheet until the motor, in its cradle sits at the right level. The lead should be held in place with strategically placed plasticard strips and the cradle fixed down to the lead with the self tapping screws that originally held it to the Bachmann chassis.
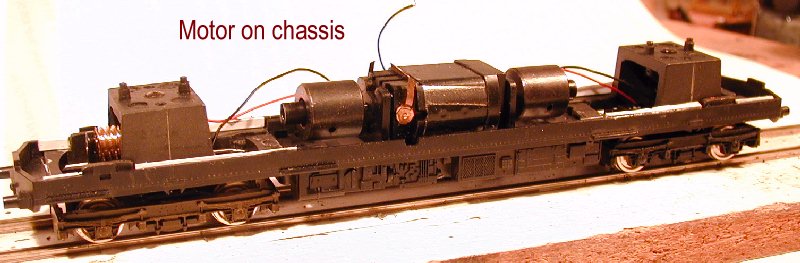 Motor fitted to chassis |
 |
 |
 |
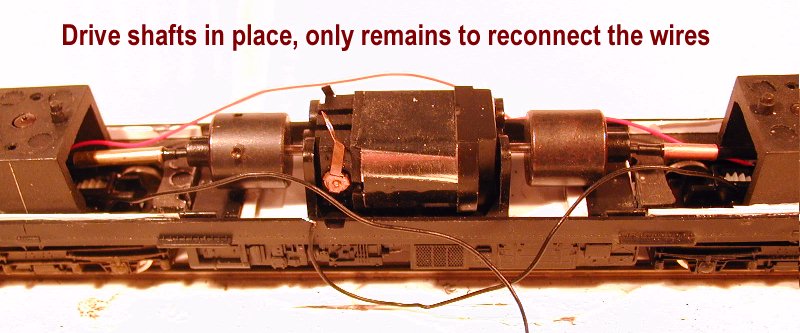 Complete except for wiring |
Measure the required length for the driveshafts, mine were slightly different, and assemble using brass tube and epoxy adhesive. Once set you can put everything together, connect the wiring, and give it a trial run.
To extend pickup from all bogies of the train I have used couplers with built in electrical connections. For these go to the dmu couplings page.
The result is an awesome dmu, smooth, quiet and powerful. Granted the drive interferes with the seating and needs to be painted inconspiciously since the dmu does not have 158 style dark windows, but the performance makes up for it. I am so pleased I've done a second one, and visibility is not a problem at all for the parcels car.
Copyright Keith Norgrove.