| MODEL RAILWAY NEWS | JUNE 1970 |
| STARTING IN PROTOFOUR |
|
| By R. A. Ganderton | Part One |
ONE OF THE FIRST remarks made by a modeller on seeing a Protofour layout running at an exhibition is "Yes, it looks right and runs beautifully—but I am too committed to 00 to change now.” It is to show these modellers just how easy it is to pursue a policy of accurate scale modelling, and also to try to encourage beginners to start immediately in Protofour, that this series of articles has been written.
To start with, let us clear away a few of the more common misconceptions and rumours concerning Protofour. Because we quote the track gauge to two decimal places in millimetres (18.83 mm,) we are often asked how we can hope to measure to that accuracy when making trackwork. The answer to this question is that the modeller does not even need to know the measurements—the toolmaker who machines the sets of gauges is the person on whom the responsibility for their accuracy falls, and he works to even tighter tolerances. As long as the modeller uses a complete set of accurate steel gauges his trackwork will work properly and be easy to construct.
Another question often asked is whether a lathe or other machine tools are needed. The simple fact is that a lot of people just do not realise that the parts needed to build a Protofour layout are, or will be in the near future, available commercially. It is true that only one company supplies all the parts, but this enables them to exercise a degree of quality control which appears to be sadly lacking in the model railway trade up to now. So the answer is that since round wheels are available commercially, the Protofour modeller requires no lathe or other sophisticated machine tools.
As all the Protofour constructional techniques have been developed with the beginner in mind and, as all the difficult precision work has been removed by the use of accurate gauges, working in Protofour is much easier and, of course, the finished layout is much better.
The articles which will follow this one will be entirely practical, as I think that the theory behind Protofour has been expounded enough in magazines during the past three years or so, and I will not repeat it here. However, the modeller is strongly recommended to read these articles (1, 2). as this will give him a better idea of how a pair of flanged wheels behave on the track.
The theme underlying this series will be the simple conversion of existing models from 00 or EM gauge to Protofour using only commercially available parts. I will not be concerned with how to superdetail the body, or put flush windows in Triang coaches, but solely on how to improve the running gear and trackwork, as I believe that once the wheels and track are correctly scaled the modeller will add details and improvements to the bodies. Just the simple process of changing the wheels to ones which have scale flanges and are set to the correct gauge improves the appearance out of all proportion to the small amount of work involved. To show this I hope to be able to include photographs showing the models before and after conversion as well as pictures taken of Protofour layouts.
To simplify the conversion process and so as not to be without a working layout too long the following programme has been devised:
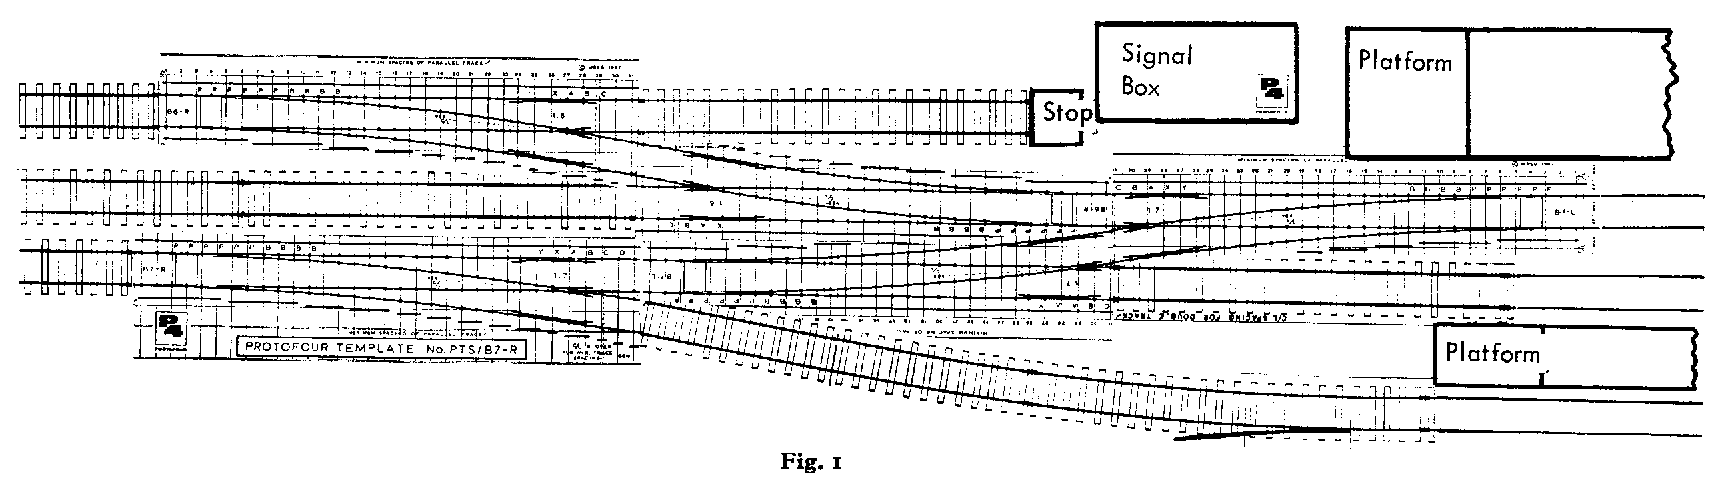
| Stage 1: Replan the layout—this is easiest done using Protofour planning templates at a scale of 1 mm.:1 ft. on a large sheet of stout paper. These templates are self-adhesive and easy to use. (Fig. 1.) |
| Stage 2: Build the necessary trackwork, away from the layout, using the 4 mm.:1 ft. templates corresponding to the planning templates used in stage 1. This ensures that the pointwork fits together as you intended during planning. |
| Stage 3: Re-wheel as much rolling-stock as you want and at least one locomotive using wheels to Protofour standards (ie. BS 276 A (1927) reduced 1:76.2). |
| Stage 4: Remove the old track from the layout and lay the new Protofour trackwork in the correct position. |
| Stage 5: Convert the remaining stock. |
Of course, if you are stripping the old layout down anyway, the order in which you perform the stages is not so critical and, by the way, this is as good a time as any to decide to go Protofour. Stages 2 and 3 can proceed simultaneously if desired. Note that in the conversion programme no rolling stock, locomotives or other accessories are scrapped. Only the wheels and track work arc not re-used, and you might be lucky enough to dispose of these through the classified columns of this magazine. To conclude this introductory article and to demonstrate just how easy conversion is, let us convert a Triang coach to Protofour. For this exercise we need just two sets of Protofour disc wheels. If the coach is one of the new BR Mk.II on B4 bogies, then the wheels must be 3 ft. 1˝ in. plain disc, otherwise standard 3 ft. 7˝ in. disc coach wheels. The actual conversion is simplicity itself, Using your fingers gently spring the bogie sides apart at the axleboxes and remove the Triang wheels and axles. Insert the P4 wheels and axles by reversing the removal process and press on the axleboxes with finger and thumb to ensure that the axles are not tight in the axleboxes. The coach is now converted to P4 at a total cost for wheels and axles of 9s. 3d. The Triang coupling is removed if it is not being used and replaced with a coupling to suit your taste, In the next part I hope to deal with a variety of different wagons. In the meantime if you have any queries I will be only too pleased to try to answer them.
1. M.R.N. May 1970
2. M.R.C. “Protofour—parts 1 to 12“ Jan-Sept.
1967 April 1968, Nov. 1968,
April 1969.
Copyright - R A Ganderton, reproduced with permission.
Back to Magazine Index, Back to Site Index.
K Norgrove 25/04/03